Commerce Platform
Shopify
Shopify is a leading e-commerce platform that allows you to create and manage your online store with ease. Keys to obtain:1. Shopify Store Domain
- Variable Required:
SHOPIFY_STORE_DOMAIN - How to Obtain:
- Your Shopify store domain is the URL of your Shopify store. You can obtain it in shopify dashboard, it should be without
httpsand/at the end of the string. Example:cool-socks.myshopify.com
- Your Shopify store domain is the URL of your Shopify store. You can obtain it in shopify dashboard, it should be without
2. Headless App
- Variable Required:
SHOPIFY_STOREFRONT_ACCESS_TOKEN - Installation and Configuration:
- Visit the Shopify Marketplace and search for the Headless commerce application or navigate directly to https://apps.shopify.com/headless.
- Install the application, open it, and create a new Storefront within the app.
- In the “Manage API Access” section, click on the
Managebutton next to Storefront API. - Make sure you have enabled
unauthenticated_read_product_inventoryandunauthenticated_read_customer_tagsscopes - Copy the Private access token displayed and place it in your
.envfile underSHOPIFY_STOREFRONT_ACCESS_TOKEN.
3. Private Admin App
- Variables Required:
SHOPIFY_ADMIN_ACCESS_TOKEN,SHOPIFY_APP_API_SECRET_KEY - Application Setup and Scopes Configuration:
- Go to the Shopify admin dashboard, navigate to Settings >
Apps and sales channels>Develop Apps, and click onCreate app. - After naming and creating your app, move to the
Configurationtab. - In the “Admin API access scopes” section, click
Editand select the following scopes:write_product_listingsread_product_listingsread_productswrite_products
- Under Webhook subscriptions, choose the
2024-01API version. - Lastly, navigate to the
API Credentialssection.- Copy the Admin API access token and place it in your
.env.localfile underSHOPIFY_ADMIN_ACCESS_TOKEN - Also, copy the
API secret keyand place it in your.env.localfile underSHOPIFY_APP_API_SECRET_KEY
- Copy the Admin API access token and place it in your
- Go to the Shopify admin dashboard, navigate to Settings >
Search & Merch
Algolia
Algolia is a SaaS platform that provides fast, customizable, and scalable search capabilities. Keys to obtain:- Go to your account settings and API Keys
- From here copy
Application ID,Write API Key - Now go to your search dashboard and create indicies for products, categories and reviews
- Copy those indicies name as well and
- Paste obtained keys to your
.env.local
Indicies Setup
For your storefront to work properly there’s necessary setup required: Setup yourproducts index attributes for faceting:
- “hierarchicalCategories” only if you’re planning on using this feature
- “avgRating” only if you’re using reviews feature
categories index attributes for faceting:
- Configuration tab > Relevant Sort > minPrice/avgRating/updatedAtTimestamp - (ascending/descending)
Meilisearch
Meilisearch is a powerful, fast, open-source search engine. There are two main ways to host Meilisearch:- on-premise (self-hosting on dedicated servers or cloud providers)
- using Meilisearch Cloud.
- Create a new project within the platform.
- Create two indicies called
productsandcategories. If you wish to use different names make sure your environment variablesMEILISEARCH_PRODUCTS_INDEXandMEILISEARCH_CATEGORIES_INDEXare updated accordingly. - After your project is set up, proceed to the “Settings” tab of your Meilisearch Cloud project.
- Locate and copy the
Default Admin API Key. This key should be securely stored in your.env.localfile under theMEILISEARCH_ADMIN_KEYvariable. - Copy the Meilisearch URL and place it in your
.env.localfile underMEILISEARCH_HOST. Ensure you do not include a trailing slash at the end of the URL. - Set up your indicies
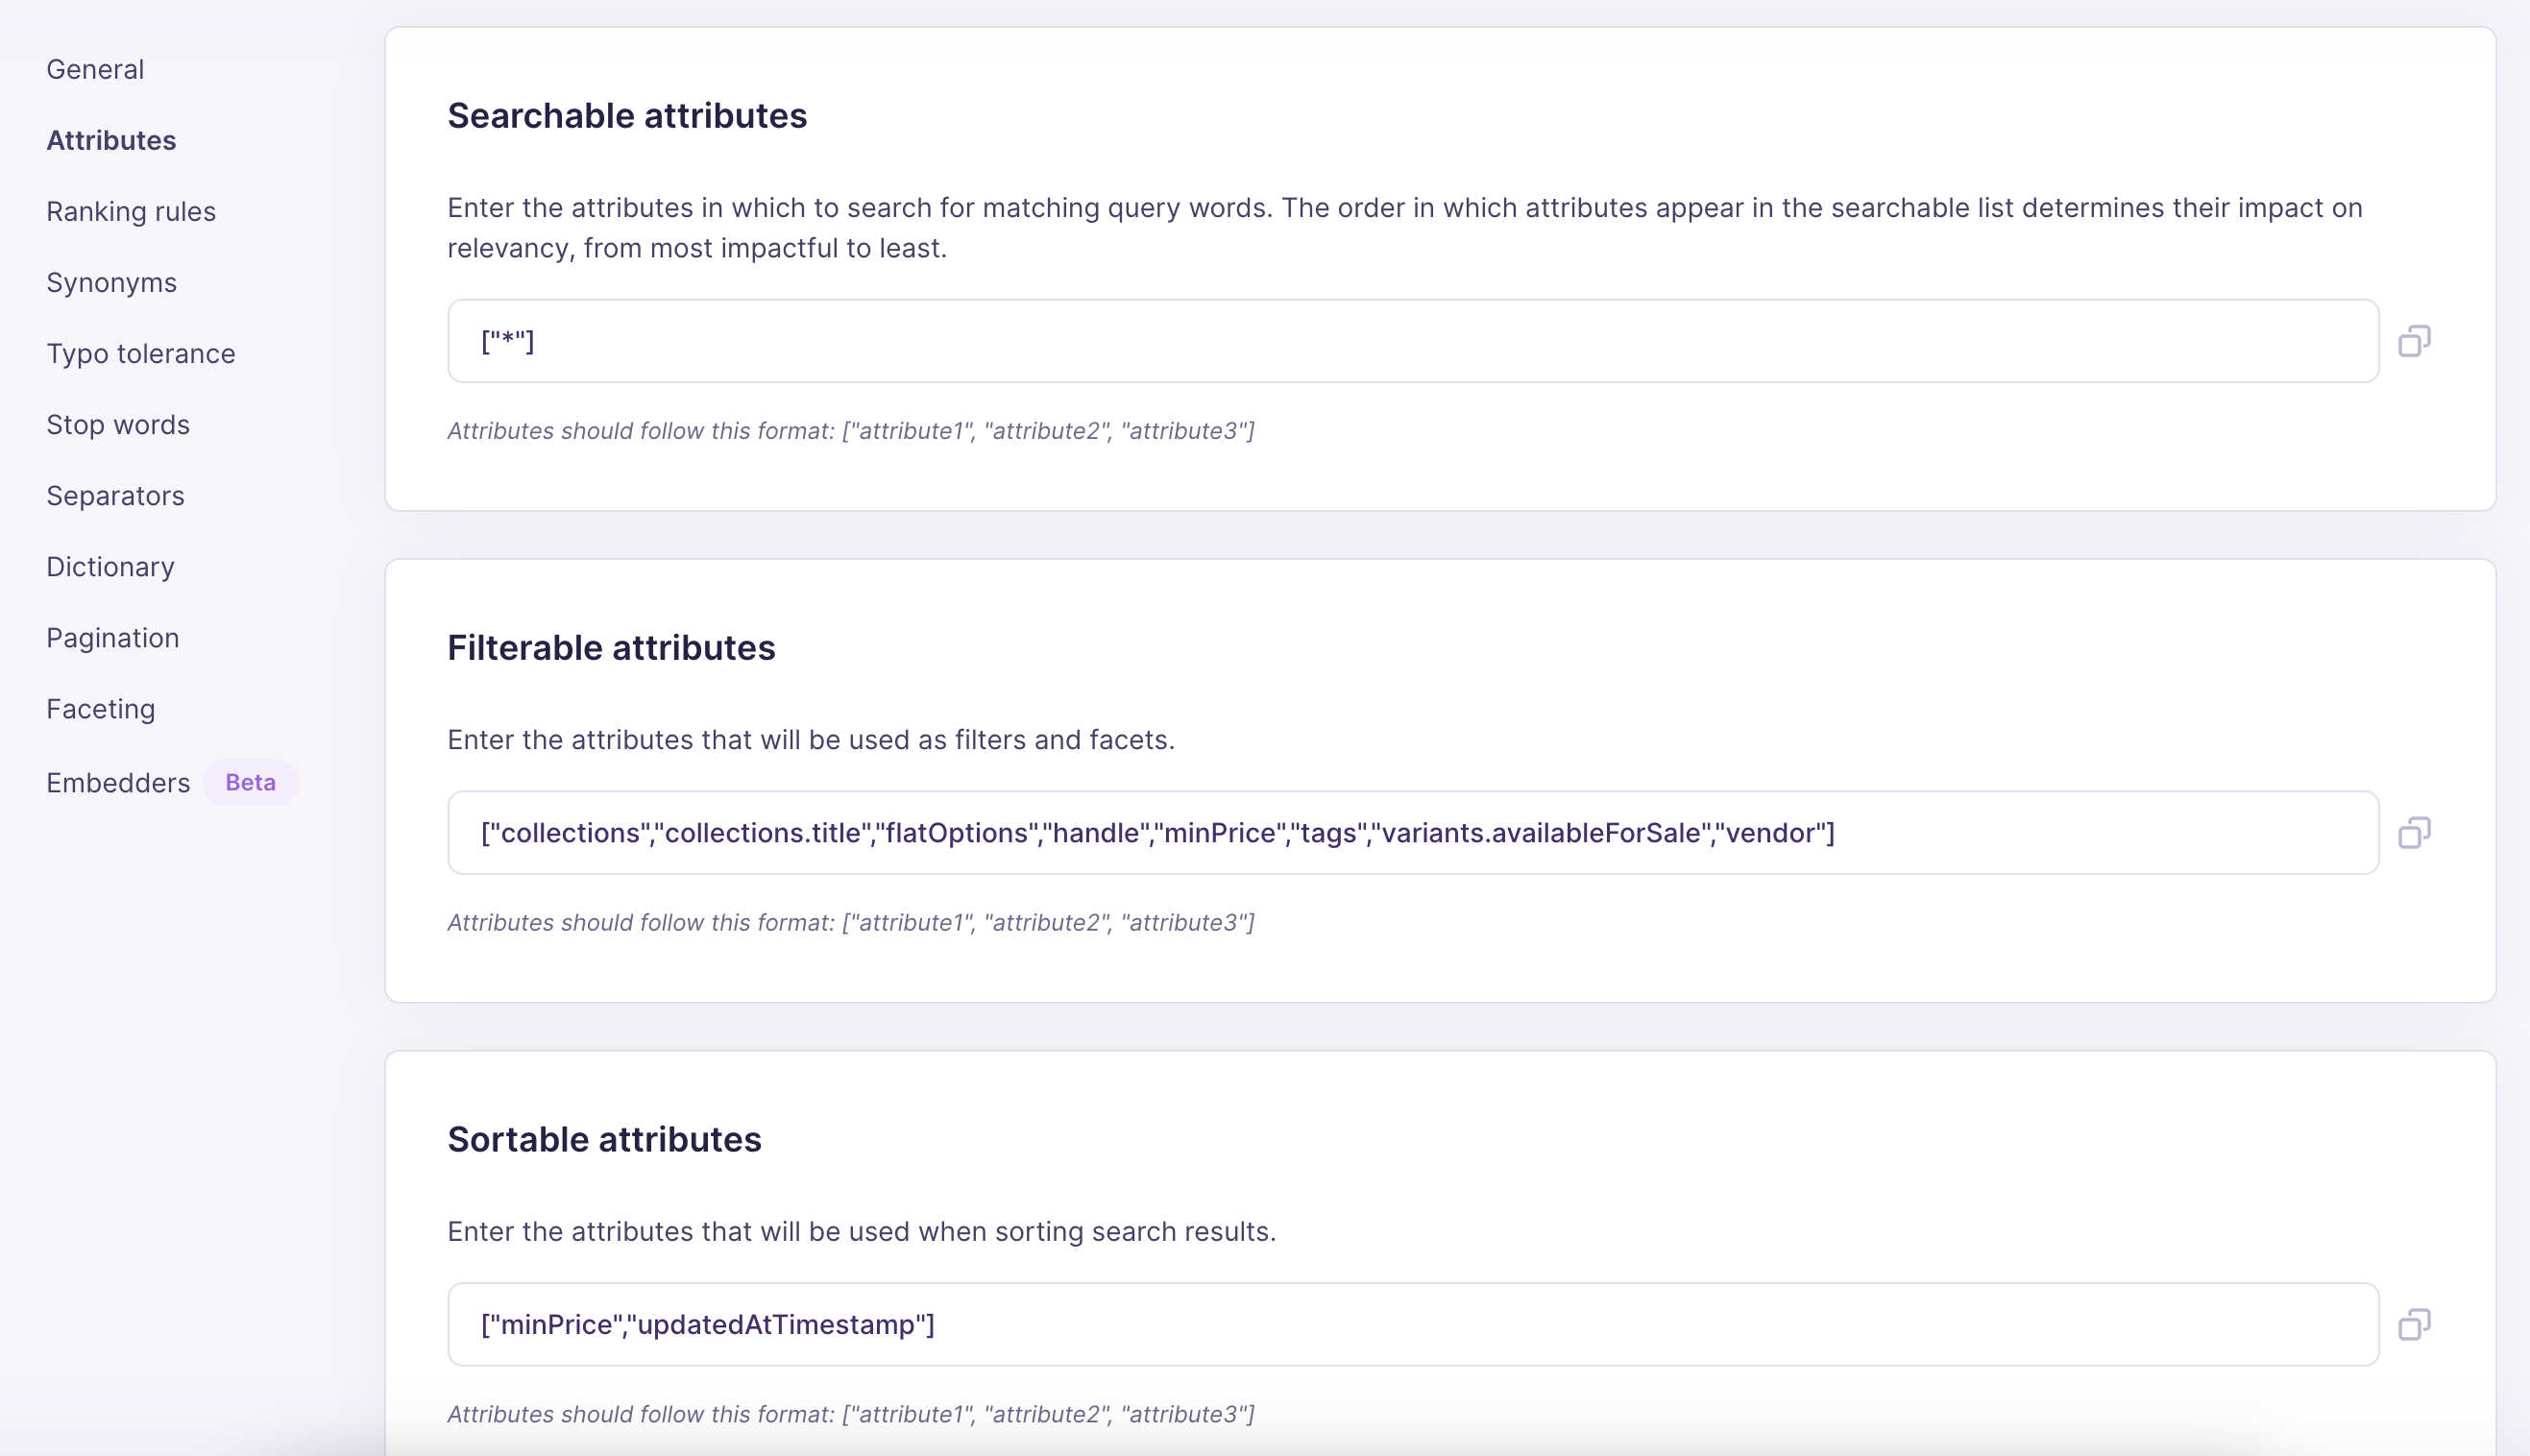
Indicies setup
The last thing, but also crucial for application to work correctly is setting your Meilisearch index the right way.
- “hierarchicalCategories” only if you’re planning on using this feature
- “avgRating” only if you’re using reviews feature
“avgRating” only if you’re using reviews feature