Introduction
In an e-commerce shop with a vast array of products, helping users find what they need quickly and efficiently is crucial. Hierarchical categories provide a powerful way to organize and navigate large product inventories. By structuring products into parent and child categories, users can easily drill down from broad categories to more specific ones, refining their search and improving their overall shopping experience. This feature allows users to filter and refine large product selections efficiently.High-level Overview
Implementation can be broken down into:- Setting up categories
- Defining hierarchies
- Assigning products to categories
- Synchronizing with your search platform
- Retrieval of facets in the frontend
Implementation overview
Defining categories and their hierarchical structure may vary depending on the platform, however we try to minimize the amount of work needed in order to get them working with your storefront. Following the design of our architecture, we push all categories to our search platform whilst also enabling other benefits, ie. categories search.Below describes steps for Shopify and Meilisearch, more providers will be added later.
Setting up categories
To set up categories in Shopify, log in to your Shopify Admin Dashboard. From the left-side menu, select Products, then from the sub-menu that opens, select Collections. Here, you can manage your collections.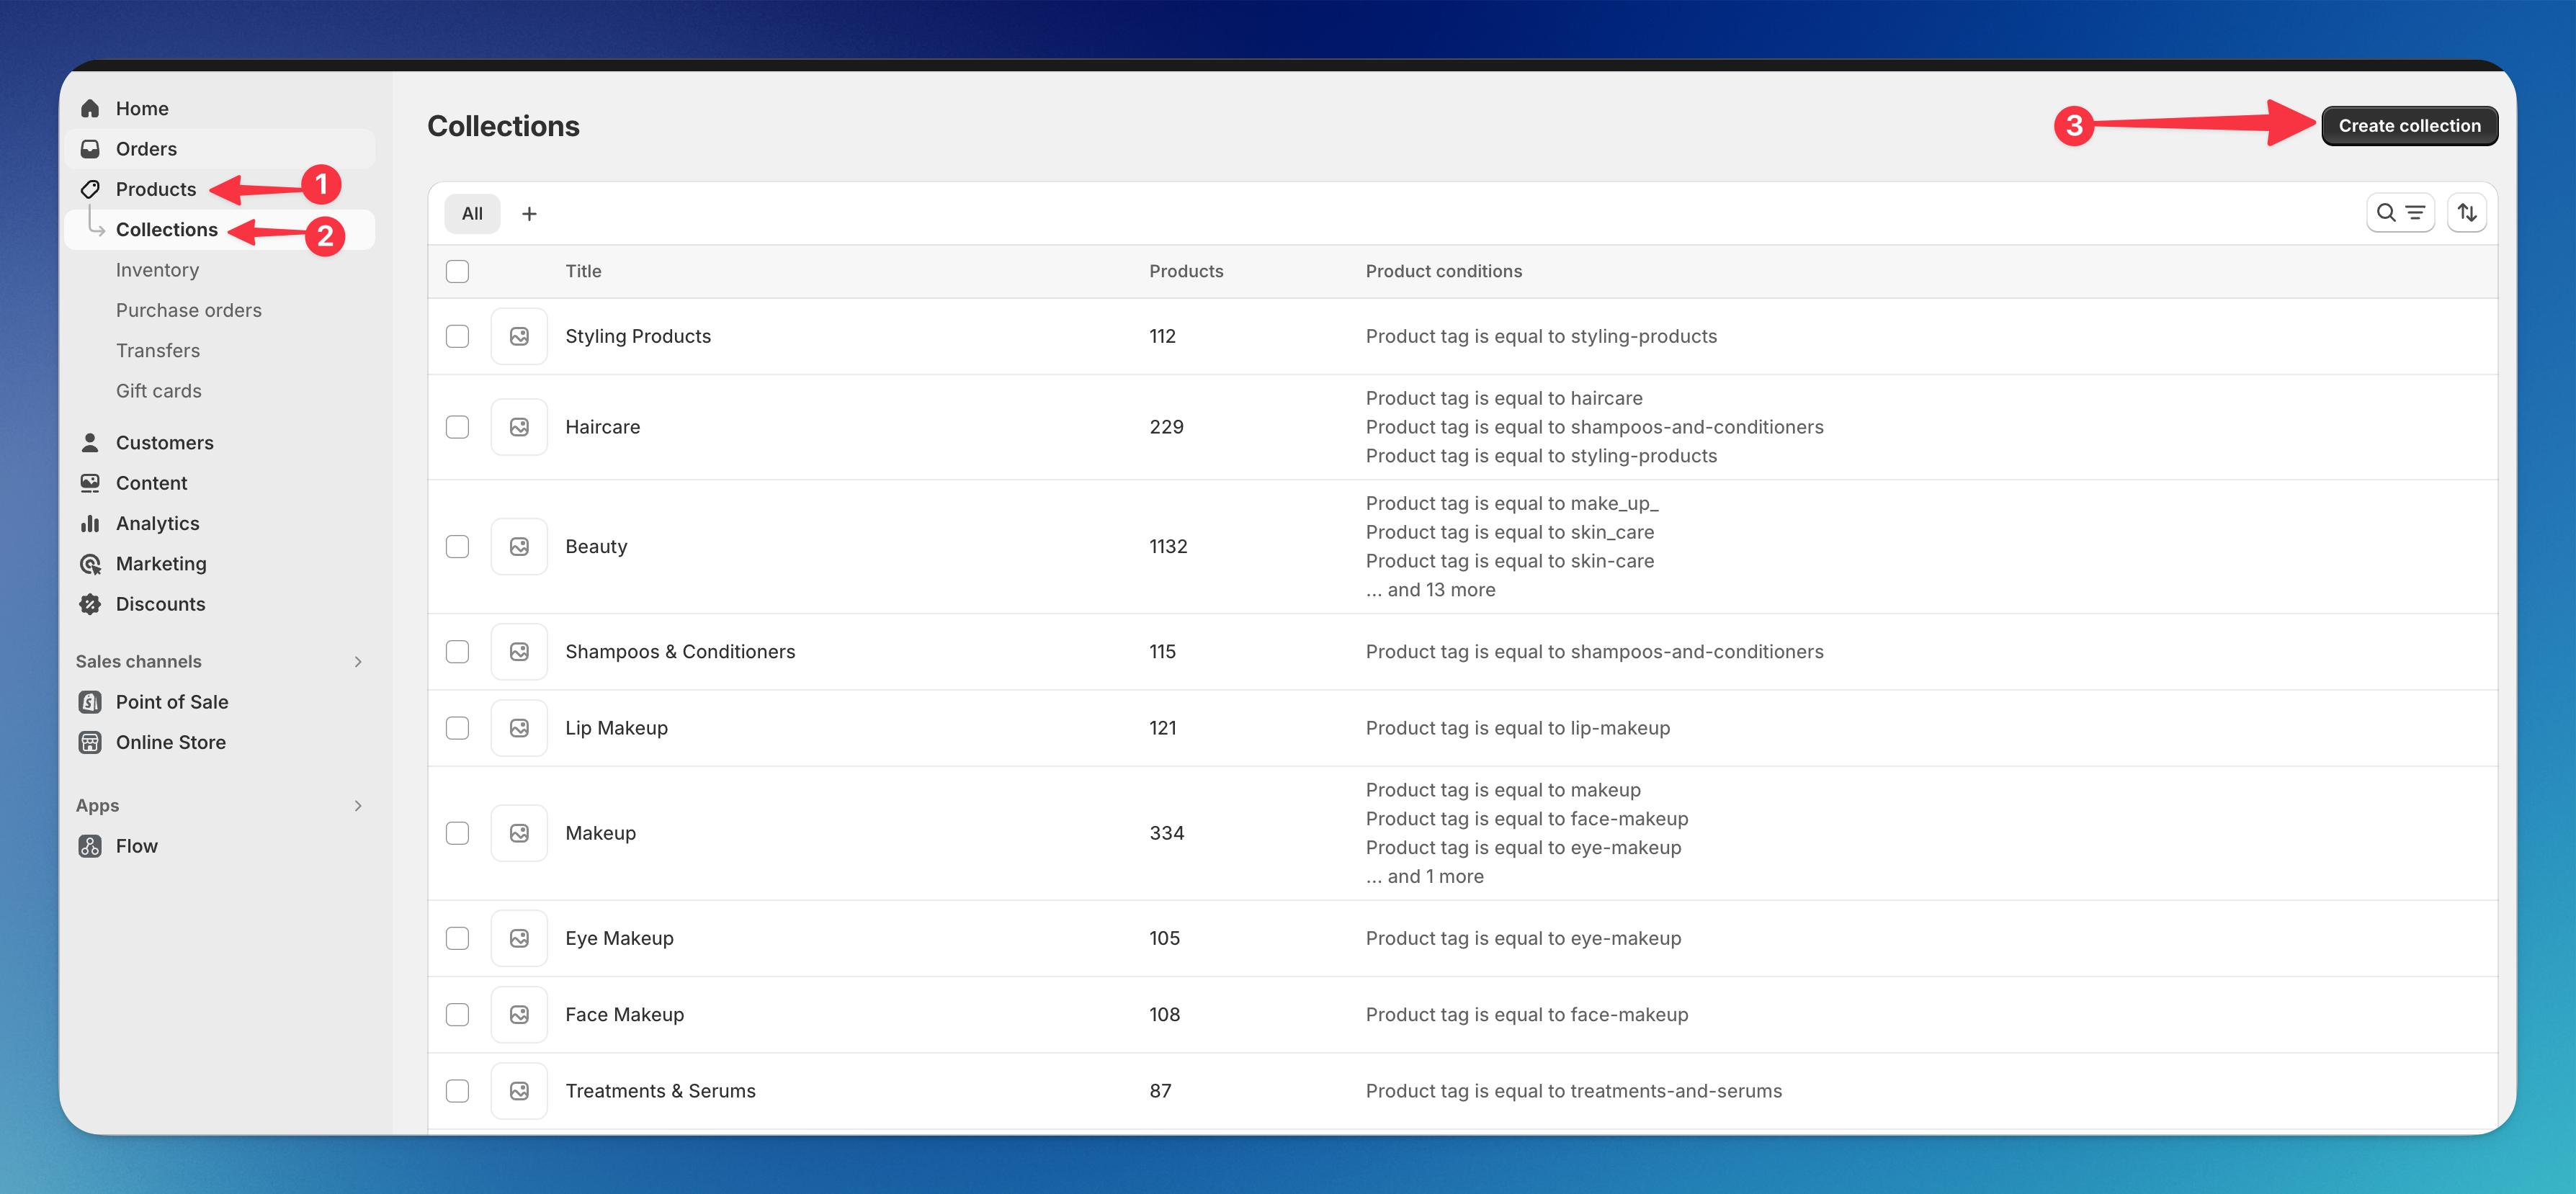
- Manual: You manually curate products that belong to the given category.
- Automated: You create conditions upon which products will automatically be assigned to this category.
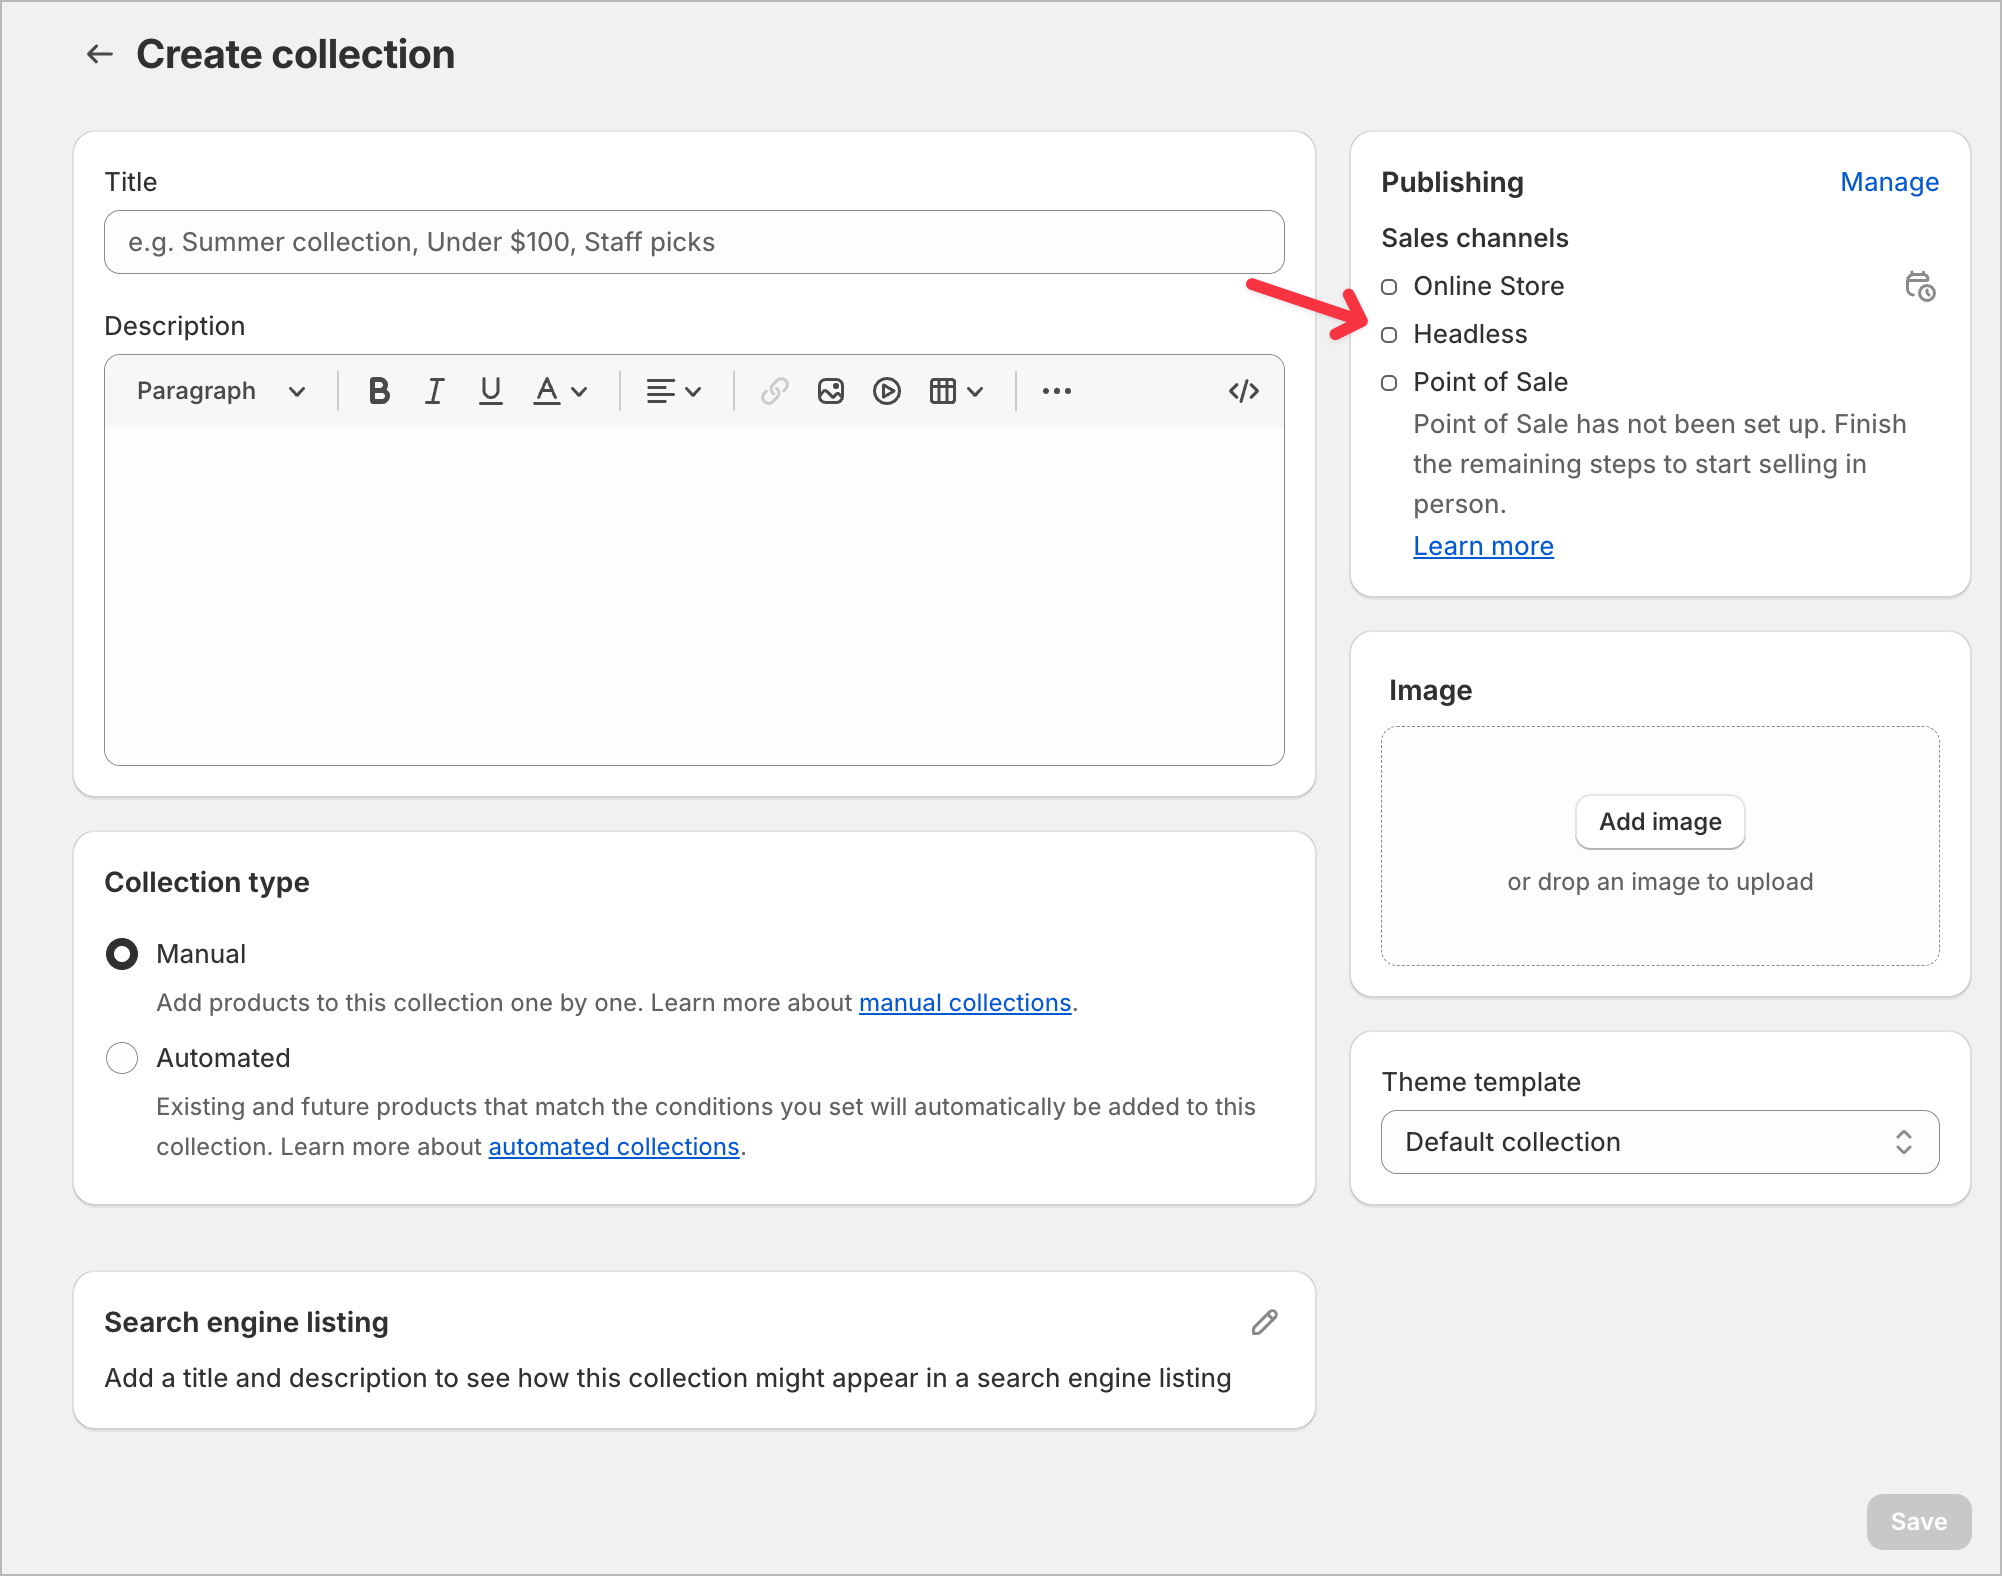
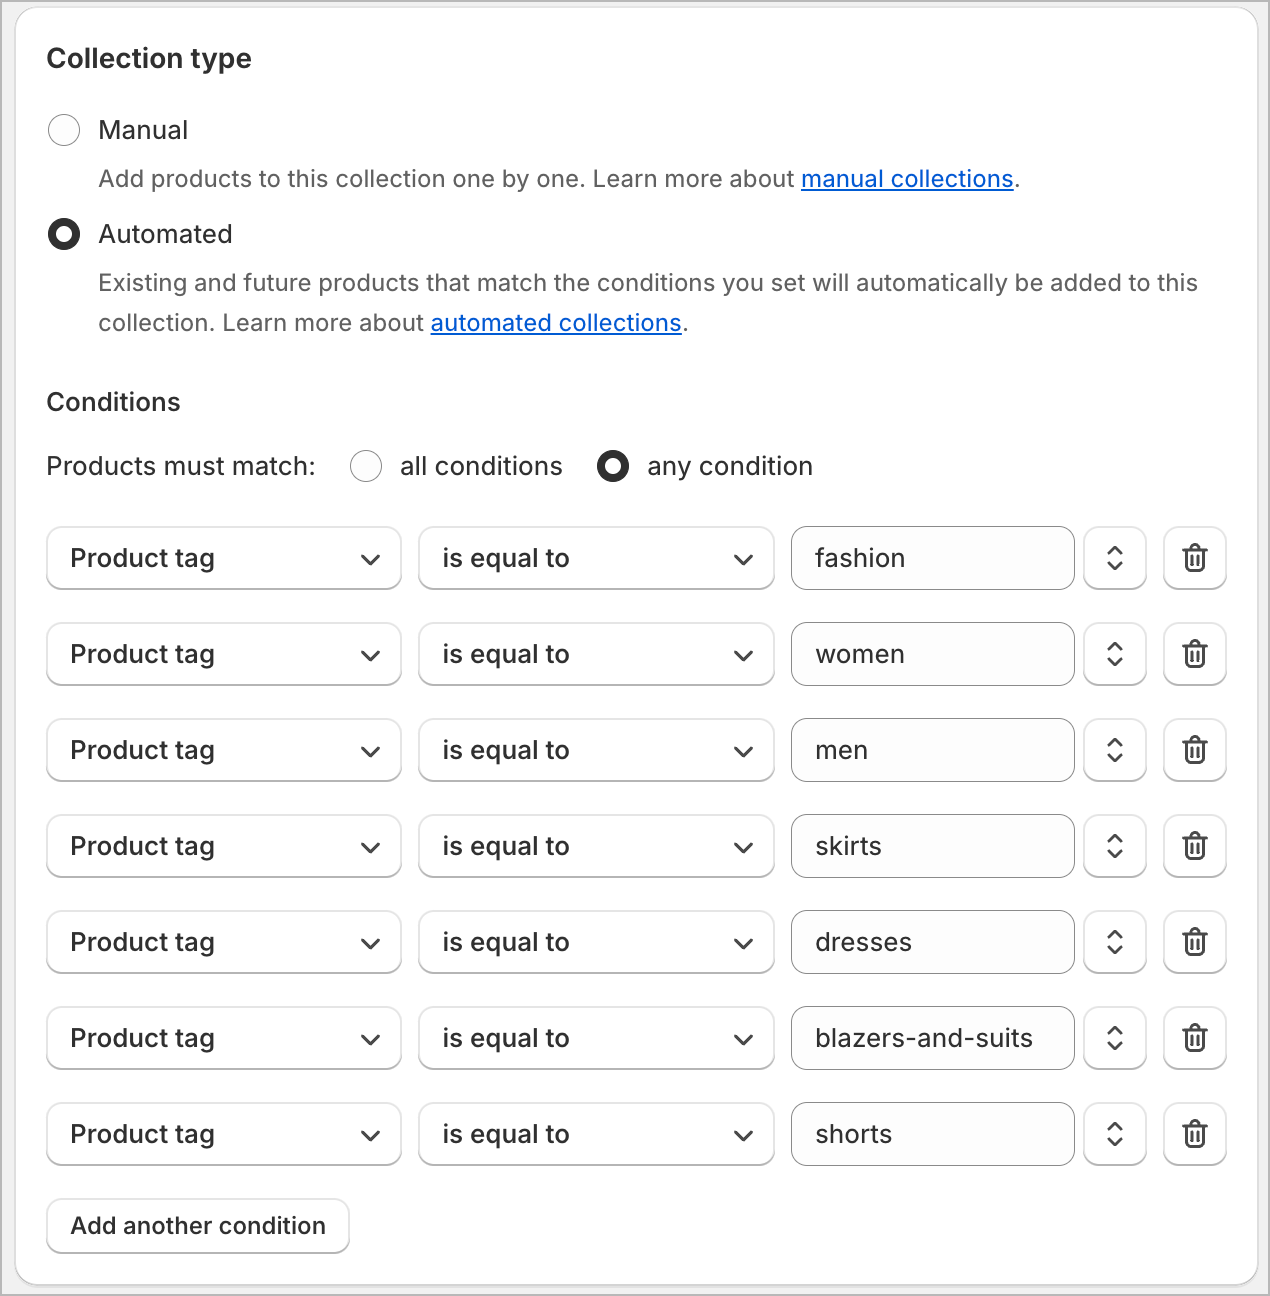
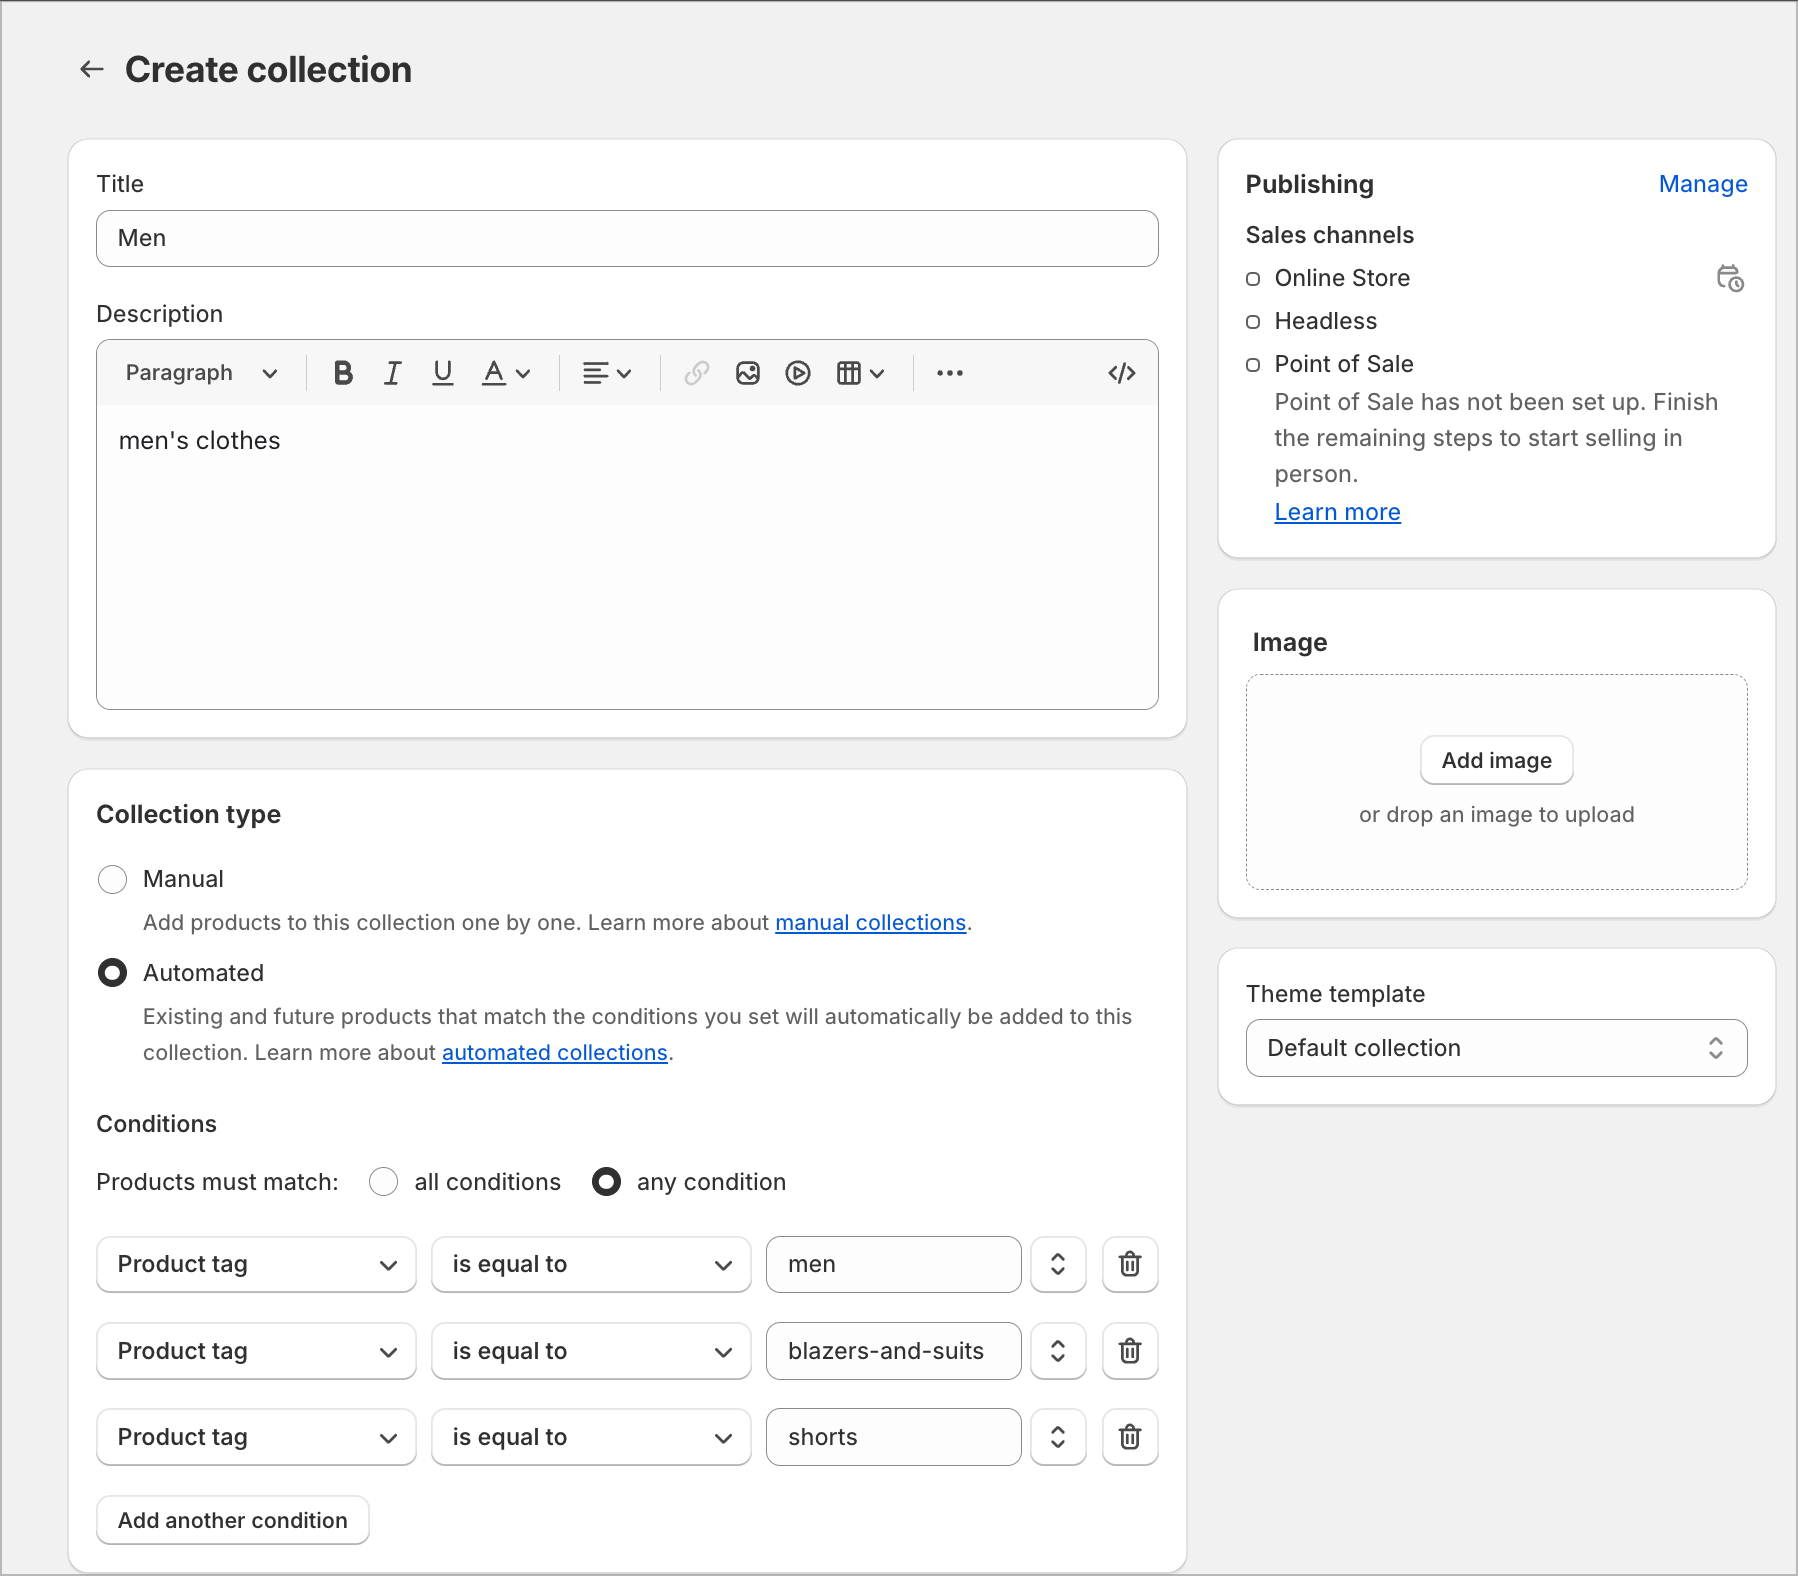
Defining Hierarchies
Defining hierarchies in Shopify can be tricky and may vary depending on the platform. In Shopify, you can use the Navigation feature. From the left-side menu, select Online Store, then Navigation, and finally Add menu.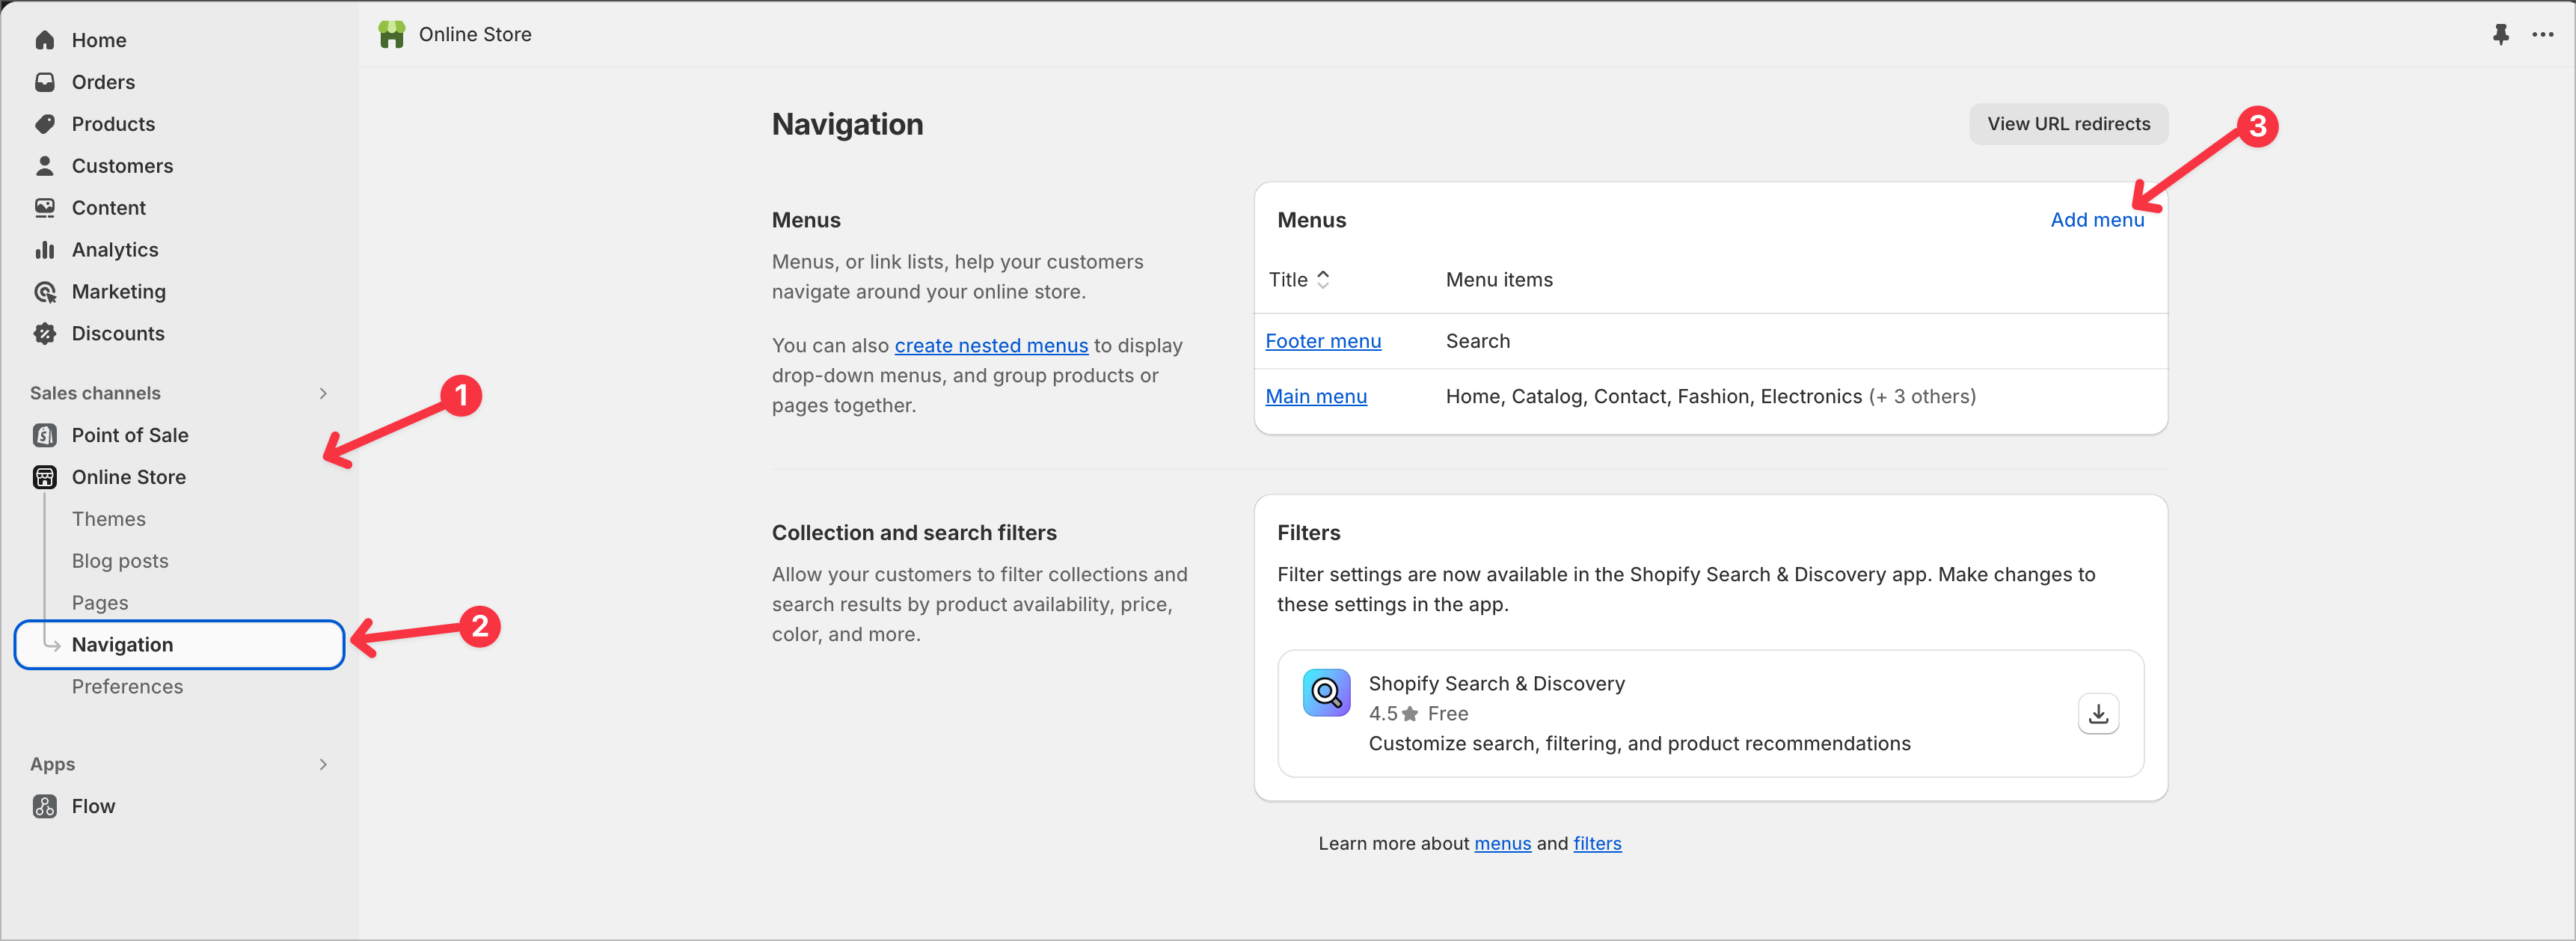
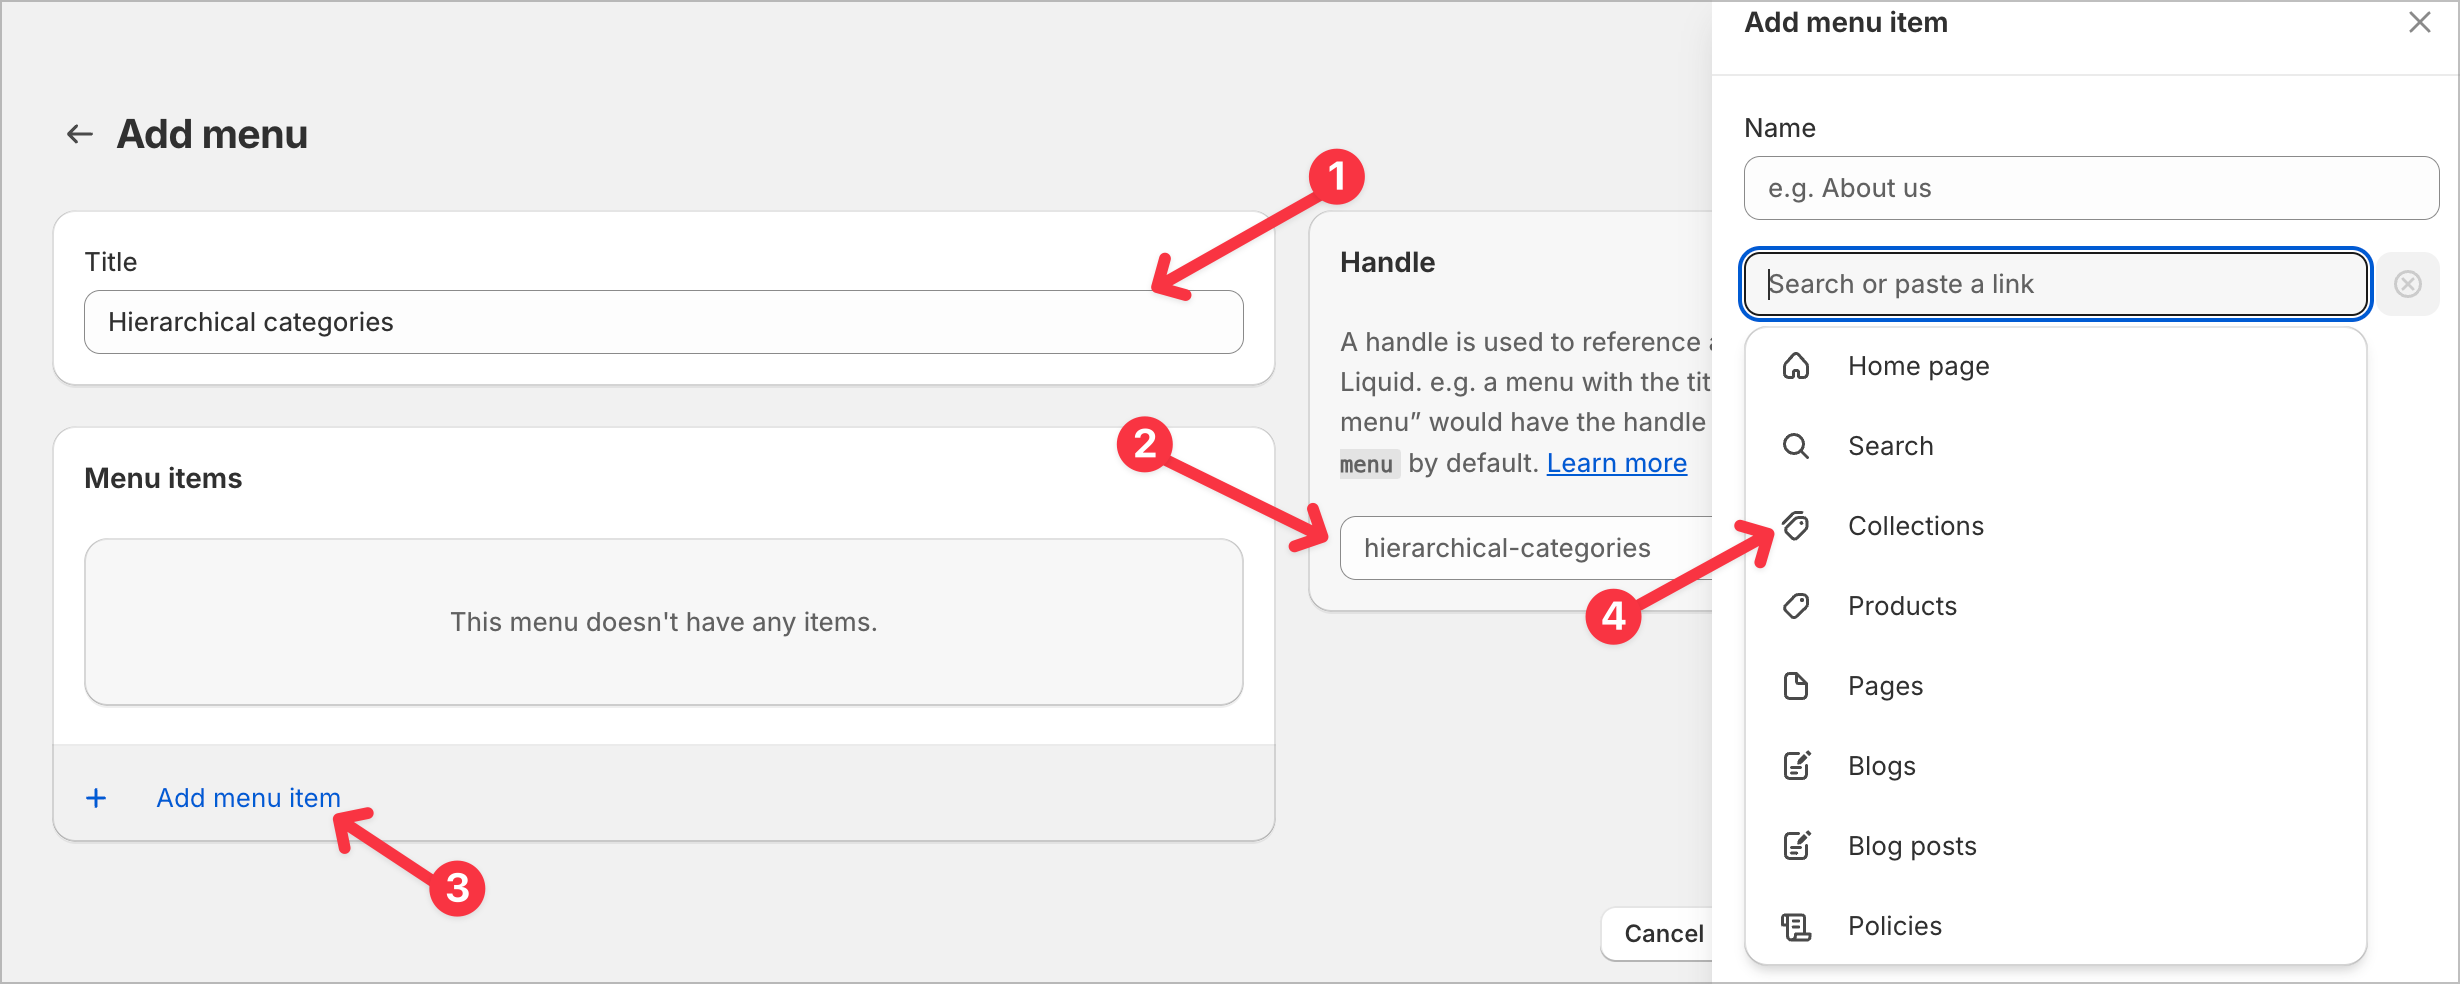
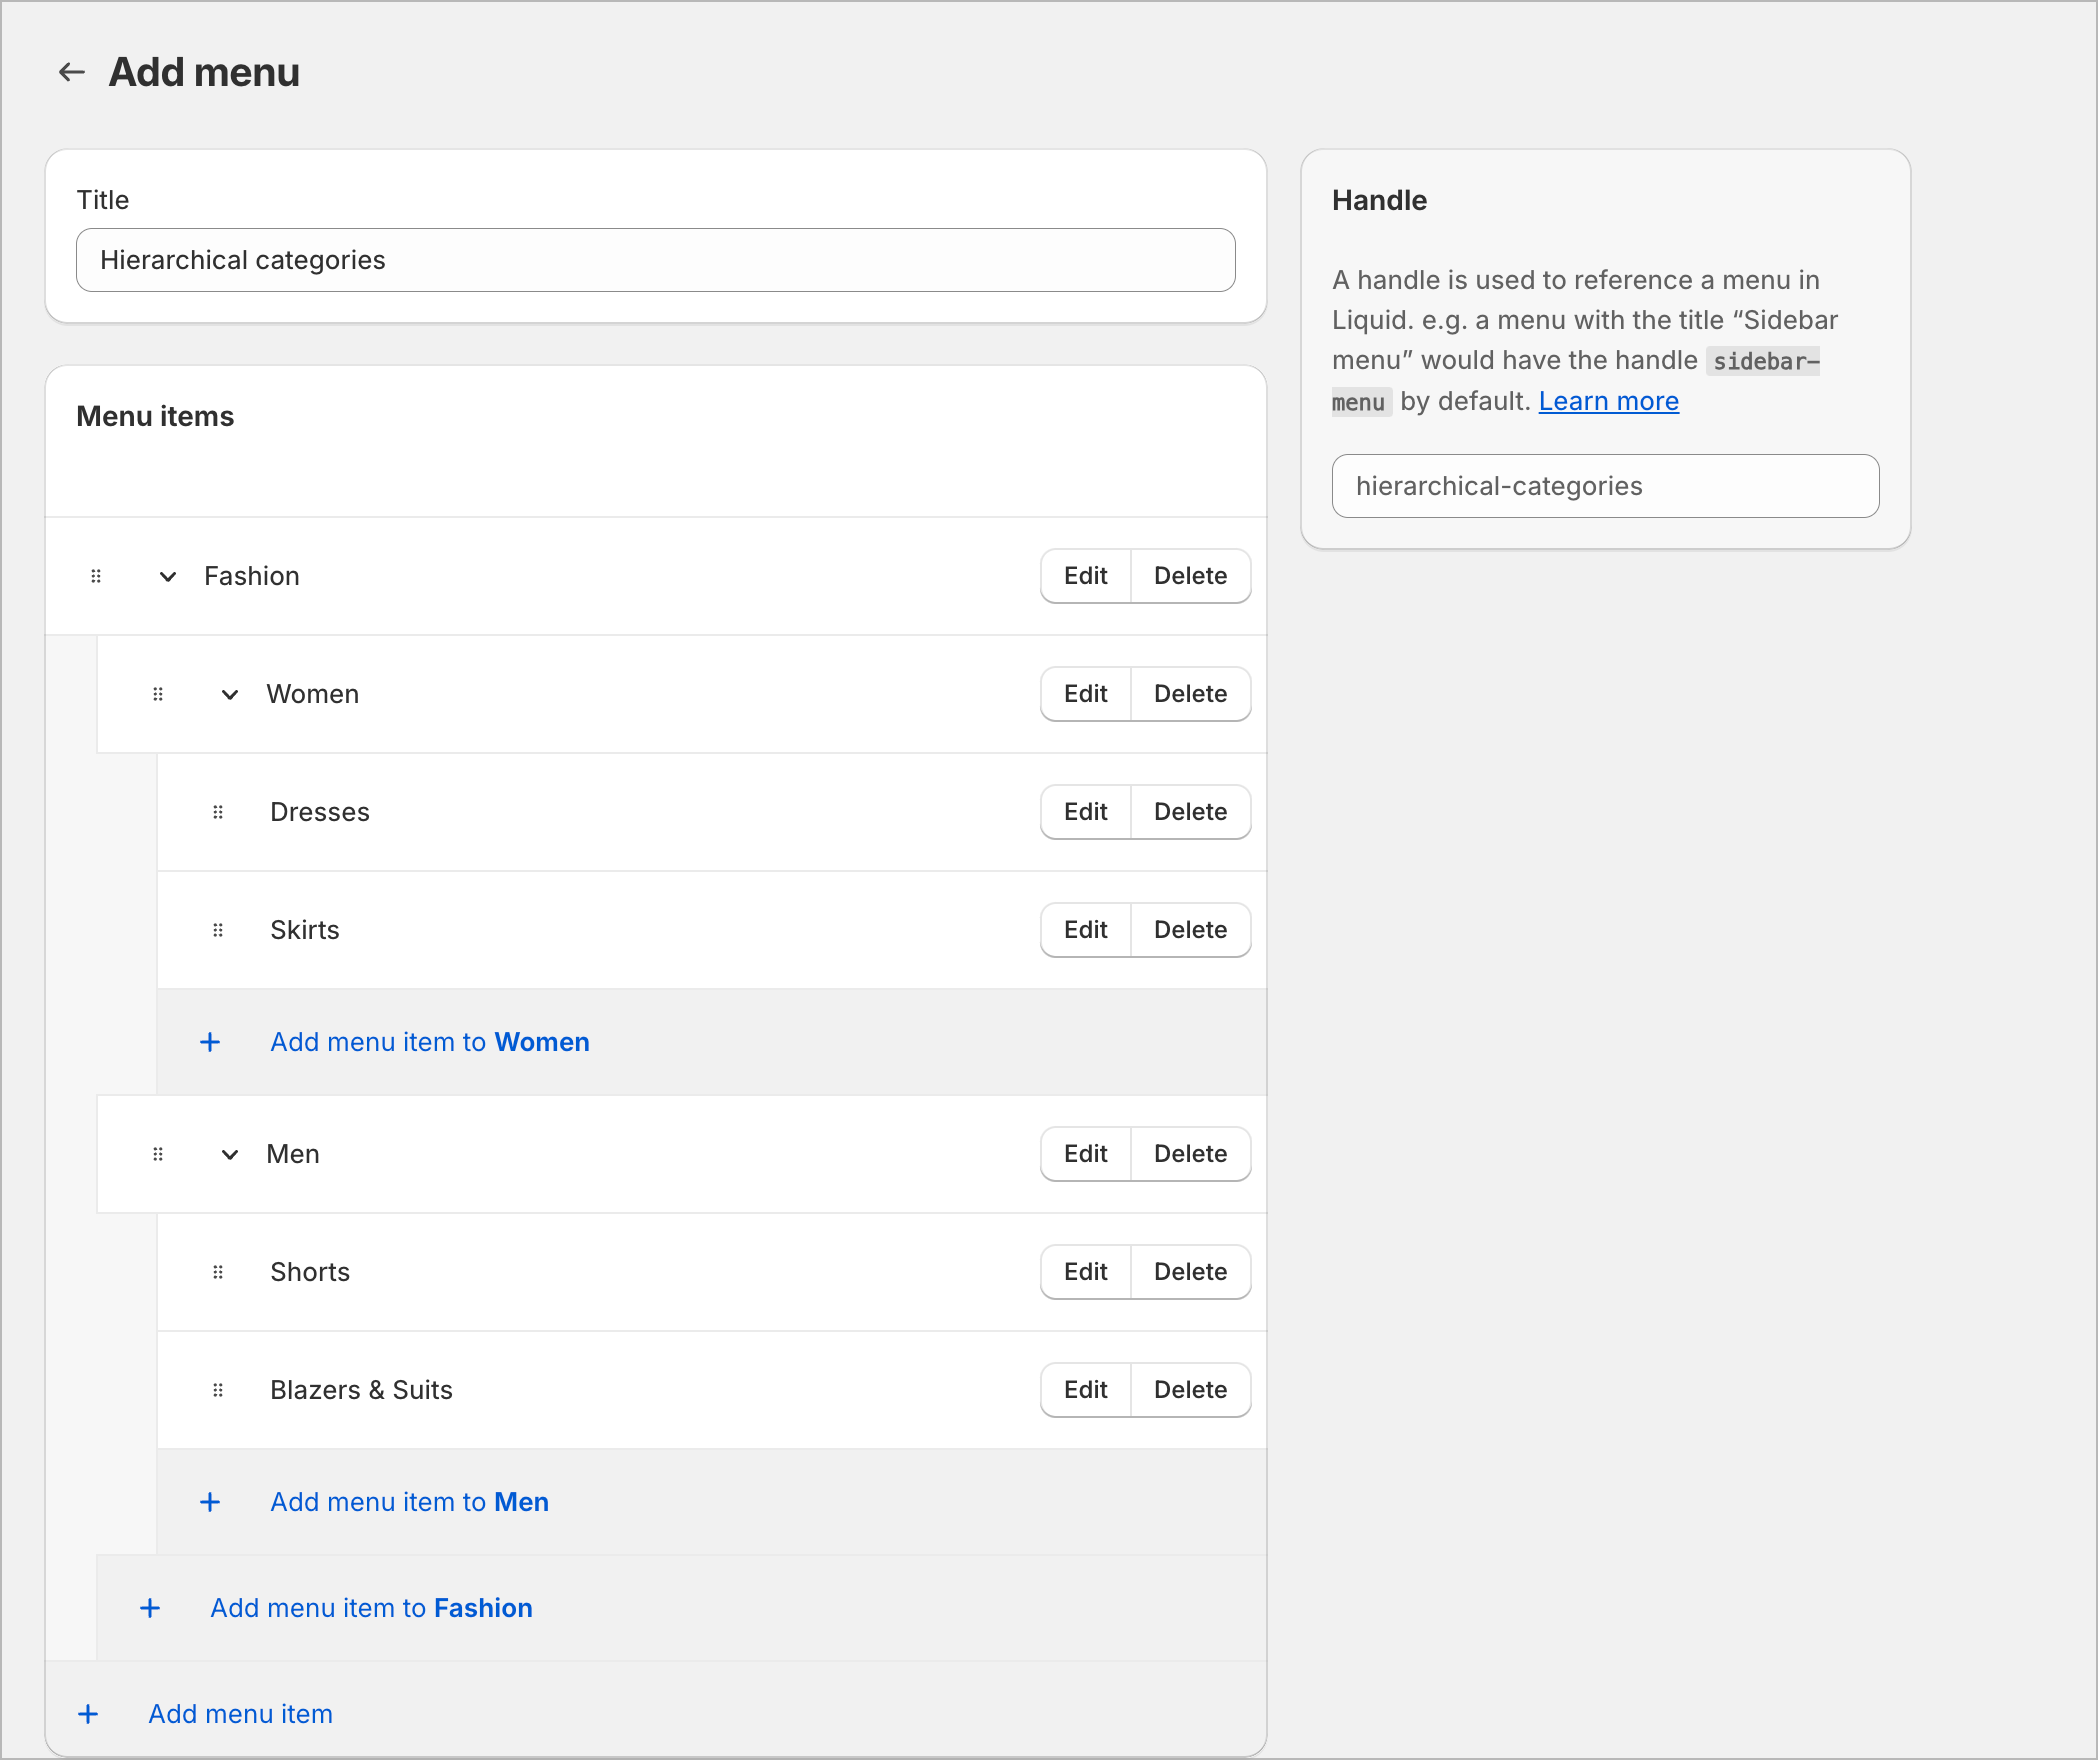
Syncing search platform & Setting-up frontend
Once you’ve completed the above steps, it’s time to push this data to our search platform. Use our CLI with thesync command. Ensure that SHOPIFY_HIERARCHICAL_NAV_HANDLE variable matches your navigation handle.
Different platforms integration
If you want to create hierarchical categories using a different platform, ensure the following data structure is provided whenever you push products to your search solution:Once this is done and the environment variable can be read, you’re all set! We also recommend reading about Search & Filtering to build proper browse experience.